Friday, August 20, 2010

New Wheels

I have finally got my car cleaned up. I finished painting the brake calipers, put some new wheels on and got the rear plastic window replaced. Followed that up by spending the day washing and waxing it and now it looks like a new car (except for the fact that the paint is covered in scratches when you get close).

Here's the front view parked just outside some rich guys house up in the foothills. Used the 50mm prime, the flash and the polarized filter, which gave some OK results.

Side view - pretty impressive backdrop! This is my favorite shot of the dozens that I took today.

rear view - showing rich dude's driveway.....

And this is what it looked like 3 weeks ago.....


The list of potential future improvement projects includes.....
  • lowering suspension
  • new front lip
  • side skirts
  • new spoiler
  • professional paint refinishing
Alternatively I could do nothing, which is more likely.

Wednesday, July 28, 2010

Night Lights

Finally got a round to taking some night shots of the BBQ. I was too lazy to get the tripod out so they are blurry. This shows the three LEDs under the seated counter, and the two under the standup bar.

This shows the one under the end counter, and also the cool blue lights on the grill and side burner.

Seated counter closeup....

This gives a better view of the whole island.

Overall the lights add to "cool factor", cost nothing to run, and were very easy to install.

Wednesday, July 21, 2010

Clean Car

So inspiration struck and I cleaned, and waxed my car. I don't remember when the car was last waxed (to be honest, I am not sure it has ever been waxed). It literally looks like a completely different car. I was so impressed I went out in search of some good spots for photos. Here's what I got.....

Obviously the rear brakes still need painting, which will happen as soon as the paint gets delivered. I am also thinking it may need to be lowered, although I will see what it looks like when I get the new wheels on.

From the back it looks OK, and with the 19" wheels and larger tires (295 vs the current 265) it should look a little more aggressive. Still not sure about a fixed spoiler. They have some pretty cool ones available, but that means getting stuff painted.

Next up will be the rear brakes, then the replacement rear window.

Tuesday, July 20, 2010

Done w Kitchen, onto the Car

Time to get the car fixed up. It is looking pretty poor right now. The back window (lame plastic thing) is finally cracked so I can't take it to the car wash, which means it doesn't get cleaned all that often.....


First step is painting the brake calipers. So far I have just done the front ones. They look OK if you don't get too close.


aaa

Saturday, June 26, 2010

More Shots

The plumber hooked up the gas yesterday and I managed to get the TV up and running and the beer tap working. I will be picking up a keg of beer at 9am this morning, which will give me a couple hours before the USA football match! And right after that it is time to burn the first food!

Here's a few shots to show it finished off taken just as it was getting dark last night.

I have these little LED lights under all the counters. They look really good when it is fully dark. I'll try to get some pics of that later on.

Here's the grill all lit up! It has fancy blue LEDs on the knobs, which look really cool in the dark. Inside it has two very good lights for night time grilling.

Artsy shot showing some closeup of the detail work and the TV behind.

Side view of the island. The kegerator didn't want to go i all that easily. I think it expanded while I was building the island as the hole seemed to be too small!

And here's the standard, full island shot!

Thursday, June 24, 2010

Almost Done


So, I am almost done. So close, I can taste the burned steaks......

Here's the stucco going on. I am very glad I decided to get this done properly VS screwing it up myself.

You can get a feel for the overall finished look from this shot.

Here is is from the other end.

Now here it is with some of the paint on, and the foot rail in place.

From the other end, starting to look done!

First shot with all the stainless stuff in. Gas still isn't connected, LED lights aren't in, and the beer keg isn't in yet, but everything else is in)

Here's the family and the new bar stools....

Getting my son trained early for a possible future career....

And if he can cook too, he'll be set!

Shot of the fridge and the beer tap (which the kids now call "Sexy")

The whole thing. I am very happy with how it turned out. Gas will be hooked up tomorrow. We need to trim the opening for the kegerator as I managed to screw up somehow and it's 1/4" too tight. Then I'll get the TV up, the heater installed and the LED lights in. Should get all that done between the beer and football this weekend!

Saturday, June 19, 2010

Getting Closer!

The tile is all installed - just needs to be grouted and sealed. Gas is run all the way to the island, just needs the final hookup. The pole for the TV, heater and shade sail is in. It's definitely coming together!

Stucco, paint, grout/sealing and gas hookup should be all done by Wednesday next week. Then I just need to install all the stainless steel stuff and hook up the beer tap. I still need to cut the hole in the side of the kegerator, which I will look at later today.

Unless unforeseen problems arise, I will be grilling (and more importantly, drinking) next weekend. And if the England football team can get their act together, they should be playing in the world cup group of 16 next Saturday or Sunday. And that is an excellent excuse to BBQ and drink beer!

Tuesday, June 15, 2010

Tiles Going On

The tiling is now underway. Most of the top tiles are on, but they are not yet grouted or sealed.

The lower tiles will go on next, they are already cut. It is starting to look pretty good now!

Here's the view from in front of the standup bar. I think the tile being flush with the edge of the granite looks really good, and I am liking the color combination.

Here's a closeup of the mitered corners. They give it a much more professional & contemporary look. This kind of detail is one of the reasons why I got a professional in for the tiling. The other is that I didn't want the tiles to fall off the first time it rains.
The rest of the tiling shouldn't be too much work now that it's all cut, and then it's stucco time. It definitely won't get finished this week, but should be up and running by the end of next week.

Thursday, June 10, 2010

Tile Time

Tomorrow is the start of tiling and stucco. We are going to do a 5" trim at the top and the bottom using a silver/green/gray slate tile. It matches the green in the granite and also the bluestone hardscape that we have. Here's what it looks like laid up against the island.

And now that the granite is all done, the beer tap is really looking good. Can't wait to get some beer going through it!

Saturday, June 5, 2010

Granite

Finally got the granite put in today. It looks good - we are happy with the color, and the honed finish. it is very flat, and the seams are pretty much invisible. They need to come back and seal it on Monday and fill the seams as it was way too hot this afternoon to do it.

It looks really nice; finally looking like a real high-end outdoor kitchen VS looking like a dodgy construction project!
Just to keep things honest, here is what is supposed to look like. So far, so good.
On Wednesday we have someone coming in to do the tile trim, the stucco and the gas plumbing. He'll probably need about 5 days and then I can finish up by putting in the grill/burner, drawers, doors, footrests, fridges and most importantly, the beer!

While he is trenching for the gas pipe I need to get the pole for the TV, heater and sail put in, and also run the conduit for the electric. I have all the brackets etc. for mounting them, so it shouldn't be too difficult.

I will be ordering the summer's first keg of beer next weekend, and should be all operational by June 19th for the kickoff BBQ! Exciting Times!

Monday, May 31, 2010

In The Meantime....

I am waiting for the granite to be installed (template is done, should be in this week!), so I decided to finish the insulation in the garage. It's a raised ceiling and is completely open so gets very hot in summer and cold in winter. Plan was to use closed cell spray foam, to avoid getting moisture problems.

I bought the kits a couple months back but then got sidetracked by BBQ work. It didn't look too hard, but the prep was going to be a pain as everything needs to be covered since it is a messy job.

It comes in two pressurized cannisters. You attach 2 hoses to the stuff and it comes out of a spray gun. It expands as it hits the surface and cures in about a minute to leave you with a rigid, durable, paintable, fire retardant foam.

Covering everything with plastic sheeting was a pain. This is the sort of thing you should do before you put anything in the garage. You can see the stuff in the bottom left of this picture.

As you are spraying overhead, it is a little messy, and since it's nasty chemicals you need to be fully protected. Here is a shot of me when I had just finished spraying. It was hard to see as the goggles were splattered with foam.

And this is what it looks like. It's only about an inch, which should be good for about R7. Once it's painted (going to paint the whole inside of the roof, beams etc matt black) it should look OK. Then I need to put in a new window and door, and get the walls/cabinets painted a darker color. Currently they are all white which is not the best for movies, video games and the kids dance parties.

Wednesday, May 26, 2010

Finally, Some Progress

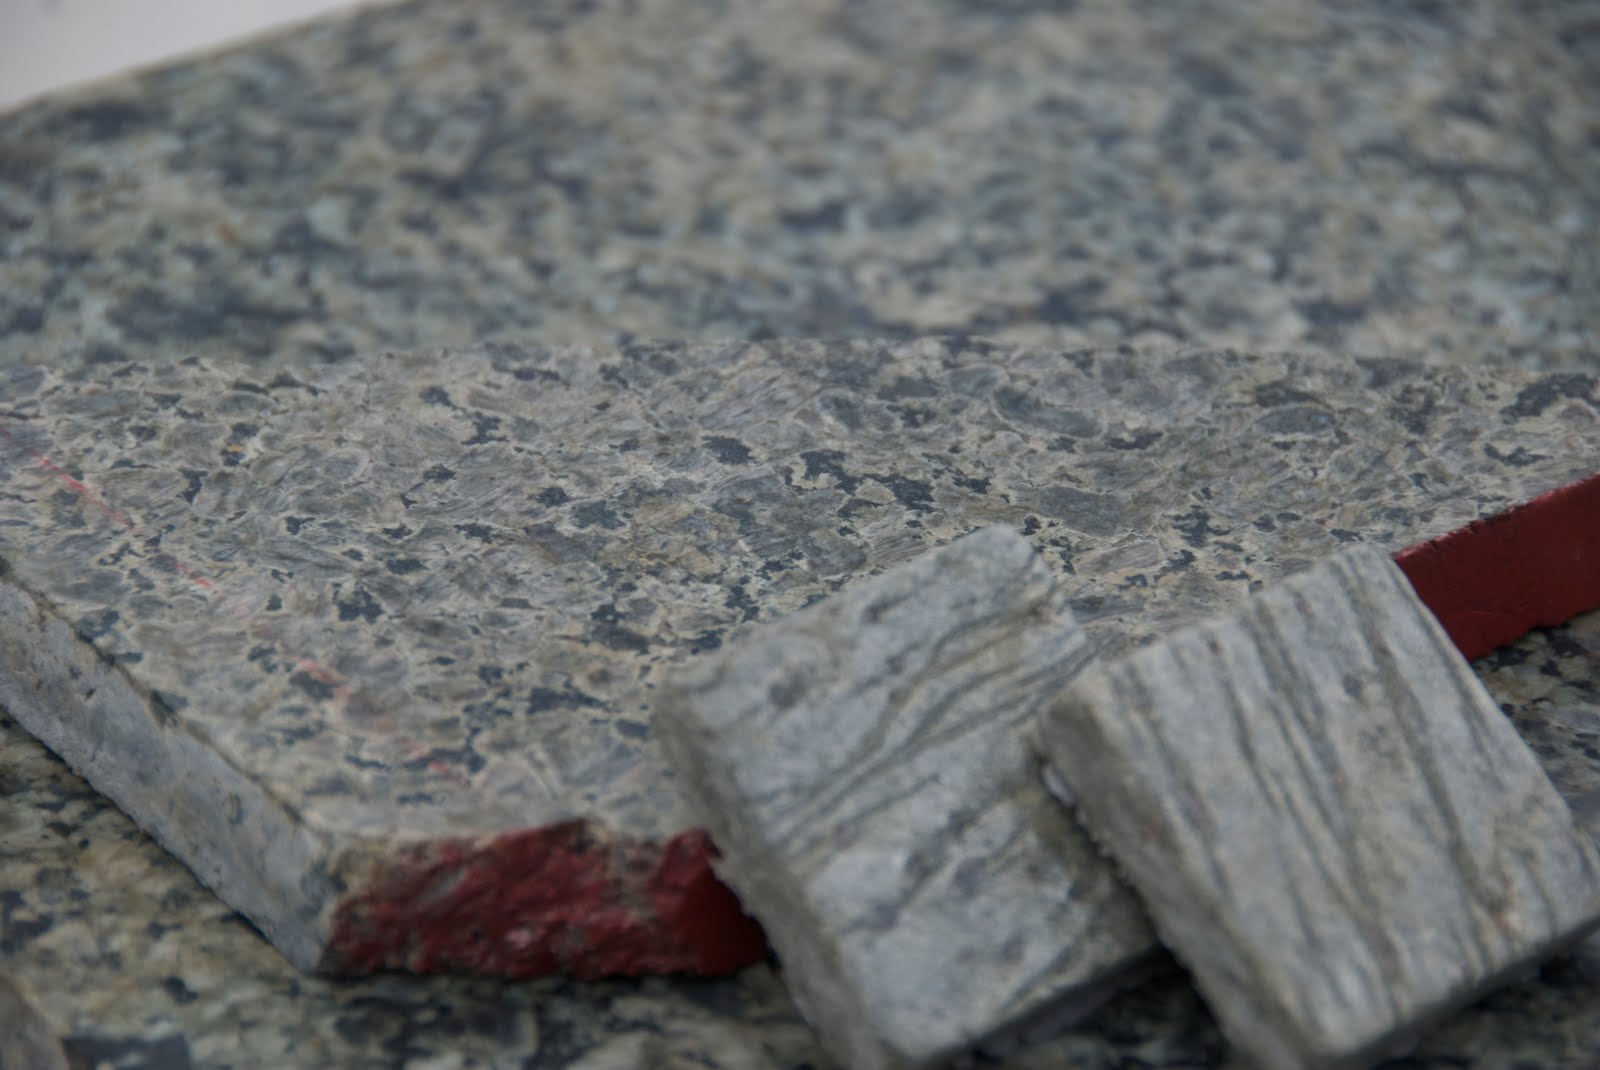
After what seems a like a fortnight of making no progress, things are now moving again. At lunchtime today I chose the granite slabs for the countertop. This was harder than anticipated due to the fact that the original choice was not available anywhere. And we had already chosen tile/paint to match it. So we found a similar granite. It's Tunas Green and I got 2 slabs for about $800, which is pretty damn cheap (~$6/sq. ft.)

This picture shows the final color (the irregular shaped piece with the red edge) and the original choice (green galaxy, the square piece underneath). You can also see the accent tile we are going to use for the edges (the small squares).

Paint colors are decided. Here they are. The dark one will be the color on the inside of the island, and underneath th counter where you sit. The lighter color for everything else.

Another problem solved is how to get a signal to the TV. Running a long HDMI cable is not easy, and would have involved holes in the walls, and burying expensive amplified cables. I went the wireless route instead. This is the final choice, and it works fine. This was solution #2. #1 was a similar unit from Phillips (cheaper, but it didn't work beyond a 15' range, so not a lot of use really)

And here's the proof that it works! TV is a cheap (under $400 32" LCD). I have ordered a waterproof cover for it, and also the extended warranty. So if it breaks I'll just take it back and get a new one.

Next up: granite guy has to come make the template, and then fabricate and install the granite. That should be done by end of next week. Then starting week of 6/7 I have someone who will be doing teh stucoo, painting, tiling and gas plumbing. He'll need a little over a week. I will need to do the beer, the pole for the shade sail, the TV, the heater and the doors/drawers & fridges. Should be all up and running by mid June, for some World Cup BBQ fun.